PHYHOO JEWELRY TOOLS
Elektrische Wachsschweißmaschine
Elektrische Wachsschweißmaschine
Niedriger Lagerbestand: 9 verbleibend
Verfügbarkeit für Abholungen konnte nicht geladen werden
- 30 Tage Rückgabe/Umtausch
- 12 Monate Garantie
- Global transportabel
Spezifikation
Spannung: 115 V/230 V 50 Hz/60 Hz
Größe: 280 x 160 x 100 mm
Gewicht: 1,7 kg
KerrLab
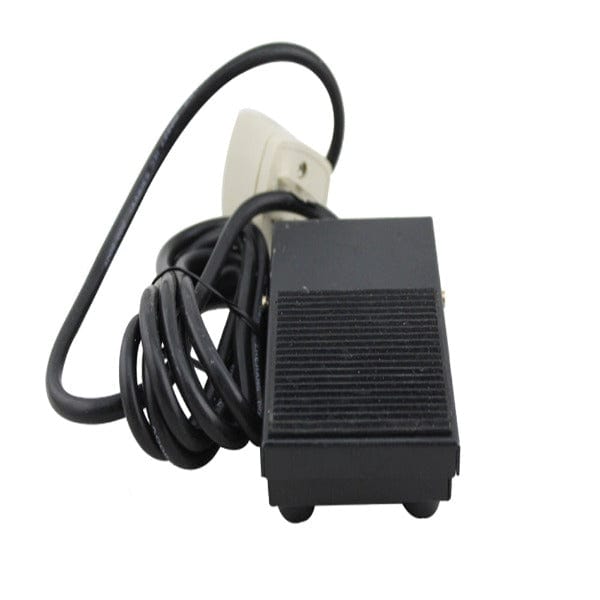
Verdrahtungsverfahren für die Verwendung eines 230-Volt-Master-Touch mit Fußsteuerung
Erforderliche Teile
1,1x Stecker mit einer Abdeckung, die die Stromkabel des Master-Touch-Netzteils und des Fußreglers durch ein einzelnes Kabelloch aufnimmt
2.1x Drahtmutter zum Verbinden der beiden schwarzen Drähte miteinander
Verfahren:
1. Schneiden Sie die vorhandenen Stecker von den Netzkabeln der Master Power Unit und des Foot Controllers ab
2. Schieben Sie beide Kabel durch die Steckerabdeckung und entfernen Sie die Isolierung von den Kabelenden
3. Verbinden Sie die schwarzen Kabel der Master Power Unit und des Fußreglers mit der Kabelmutter
4. Schließen Sie die grünen Kabel vom Master Power-Gerät an den Messinganschluss des Steckers und das weiße Kabel vom Fußregler an den silbernen Anschluss des Steckers an.
5. Schließen Sie die grünen Kabel der Master Power Unit und des Fußreglers an die Erdungsklemme des Steckers an
6. Falten Sie die schwarzen Drähte in die Steckerabdeckung und befestigen Sie die Steckerabdeckung an der Steckerbasis. Schieben Sie den Spannungsschalter auf 230 VOLT und ändern Sie die Sicherung auf 1/4 Ampere.
Stecken Sie den zusammengebauten Stecker in eine Steckdose und aktivieren Sie die Master Power Unit mit dem Wippschalter auf der Vorderseite. Der Schalter leuchtet nur auf, wenn der Fußschalter gedrückt ist, was anzeigt, dass die Stromversorgung eingeschaltet ist und die Spitze sich erwärmt. Sie können Ihre Master Power Unit jetzt mit dem Fußschalter ein- und ausschalten und haben so die Hände für andere, wichtigere Aufgaben frei.
Masterinstallation und -betrieb
Der Kerr Master arbeitet entweder mit 115 V oder 230 V, die über einen Schalter auf der Rückseite ausgewählt werden können. Beim Umschalten der Spannung müssen Sie die Sicherung wechseln. Verwenden Sie bei 115 V eine 1/2-Ampere-Sicherung und bei 230 V eine 1/4-Ampere-Sicherung. Das Gerät arbeitet mit 60 oder 50 Zyklen, ohne dass eine Einstellung erforderlich ist. Um das Gerät mit 230 V zu betreiben, müssen Sie den Netzstecker wechseln oder einen Adapterstecker verwenden. Stecken Sie das Master-Handstück in den Ausgangsanschluss an der Vorderseite des Netzteils. Dies dient zum Einschalten des Geräts. Die Schalterleuchten zeigen an, dass das Gerät eingeschaltet ist und die Spitze heizt.
Warnung: Wenn die Betriebsanzeige leuchtet, kann die Heizspitze heiß genug sein, um die Haut zu verbrennen. Der Master Touch kann so eingestellt werden, dass er mit einer einfachen Steuerung einen vollständigen Bereich an Wärmetemperaturen bietet. Der Temperaturreglerknopf ermöglicht die kontinuierliche Auswahl der gewünschten Temperatur. Diese variiert auch je nach verwendeter Spitze. Größere Spitzen erfordern eine höhere Einstellung. Informationen zur Auswahl der richtigen Temperatur für jeden Drahtdurchmesser (Spitzengröße) finden Sie in der Tabelle unten.
Wenn Sie den Knopf um eine Zahl verschieben, ändert sich die Spitzentemperatur um etwa 100 °F/38 °C. Da verschiedene Wachse unterschiedliche Schmelzpunkte haben, müssen Sie experimentieren, um die beste Einstellung für die von Ihnen verwendete Spitze und das von Ihnen verarbeitete Wachs zu finden. Mit dem optionalen Fußschalter (Artikelnr. 21870) können Sie die Temperatur durch Ein- oder Ausschalten des Geräts erhöhen oder verringern , bis Sie den gewünschten Effekt erreicht haben. Die Einstellungen 1 bis 4 werden für die Spitzengrößen 22, 24 und 28 empfohlen. Die Einstellungen 6 bis 10 liefern maximale Hitze für die 20-Gauge-Spitze. Höhere Knopfeinstellungen ergeben eine höhere Temperatur
Bei Verwendung der optionalen Fußsteuerung stecken Sie zuerst das Netzteil in
Stecken Sie den Stecker in die Steckdose und aktivieren Sie das Gerät mit dem Netzschalter. Der Schalter leuchtet nur, wenn der Fußschalter gedrückt ist. Dies zeigt an, dass das Gerät eingeschaltet ist. Jetzt können Sie Ihre Hände für wichtigere und kreativere Aufgaben freihalten. Positionieren Sie den Temperaturregler auf die gleiche Weise wie zuvor. Der Fußschalter erhitzt die Spitzen sofort. Beim Loslassen kühlen sie schnell ab. Für den gewünschten Effekt kann eine Neueinstellung erforderlich sein.
Vorsichtsmaßnahmen bei der Arbeit
1. Bei der Arbeit mit bestimmten Wachsen kann es zu Rauchentwicklung kommen. Dies deutet darauf hin, dass die Spitze zu heiß ist.
2. Richten Sie beim Einsetzen die Indexlinie an der Spitze mit einer Linie zum Griff aus und drücken Sie die Spitze gerade, bis die Spitze sitzt
3. Zum Entfernen die Spitze an der Rillenfläche greifen und gerade herausziehen
4. Während die Stromversorgung eingeschaltet ist, erwärmt sich die Spitze unabhängig von der Einstellung des Knopfes
5. Um Brandgefahr zu vermeiden, lassen Sie das Gerät niemals unbeaufsichtigt, während es eingeschaltet ist. Betreiben Sie es nicht in der Nähe von brennbaren Flüssigkeiten, explosiven Gasen oder brennbaren Materialien.